Create an eBook
To create an eBook, just go to the navigation item "ebooks" in the settings, or to the tab called "ebooks" in the pages and fill out all steps.

Select a layout
In the first tab called "layout" you can select a layout for your ebook. Typemill provides some example layouts, but you can also develop your own. Please note that all following forms and settings depend on the selected layout. Some layouts provide extensive settings, other layouts do not provide any settings or forms at all.
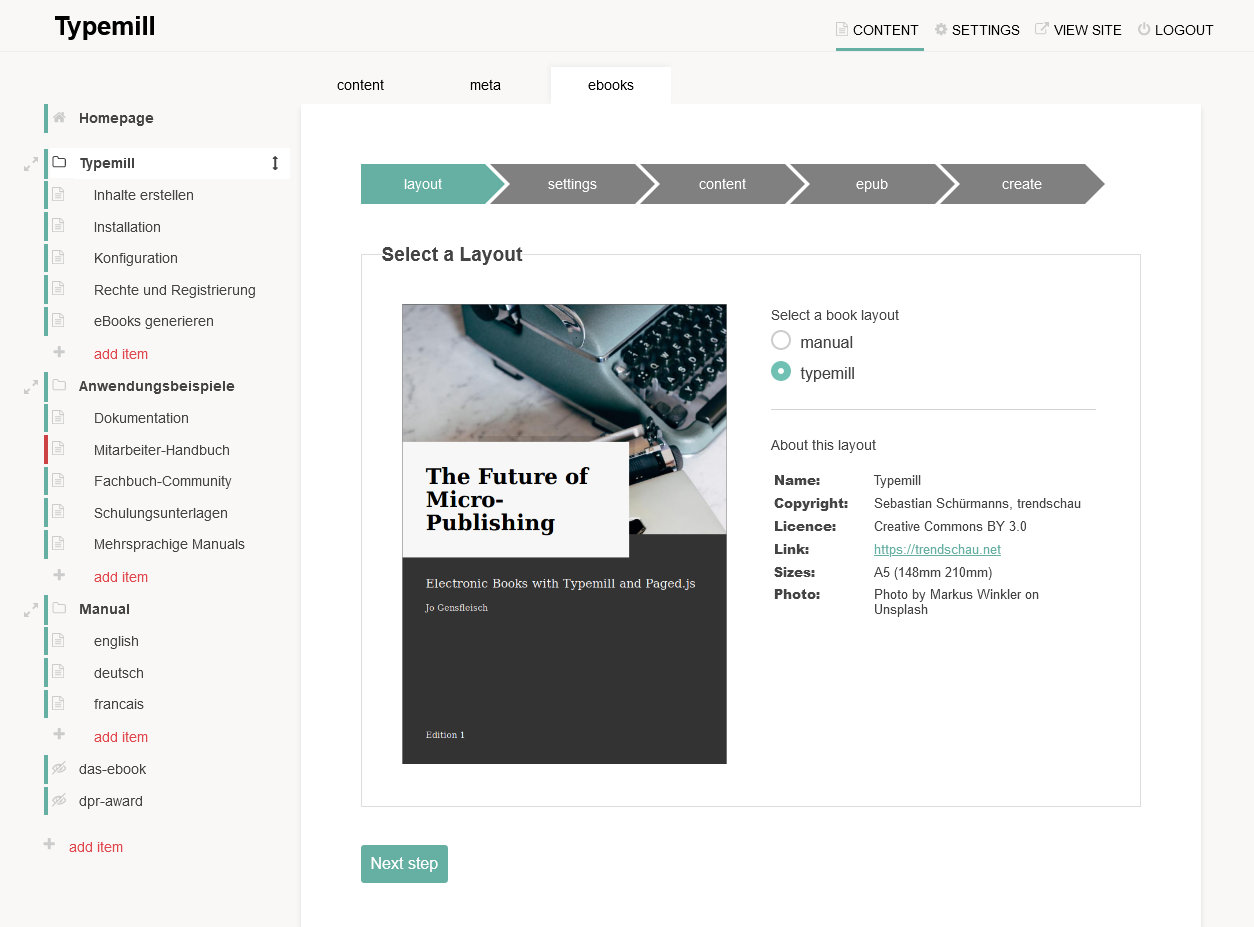
We will explain some standard forms in the next chapter.
Settings
In the settings tab you will find all kind of forms and features depending on the layout that you have choosen. To give you an impression, we will show the settings page from the "typemill" layout:
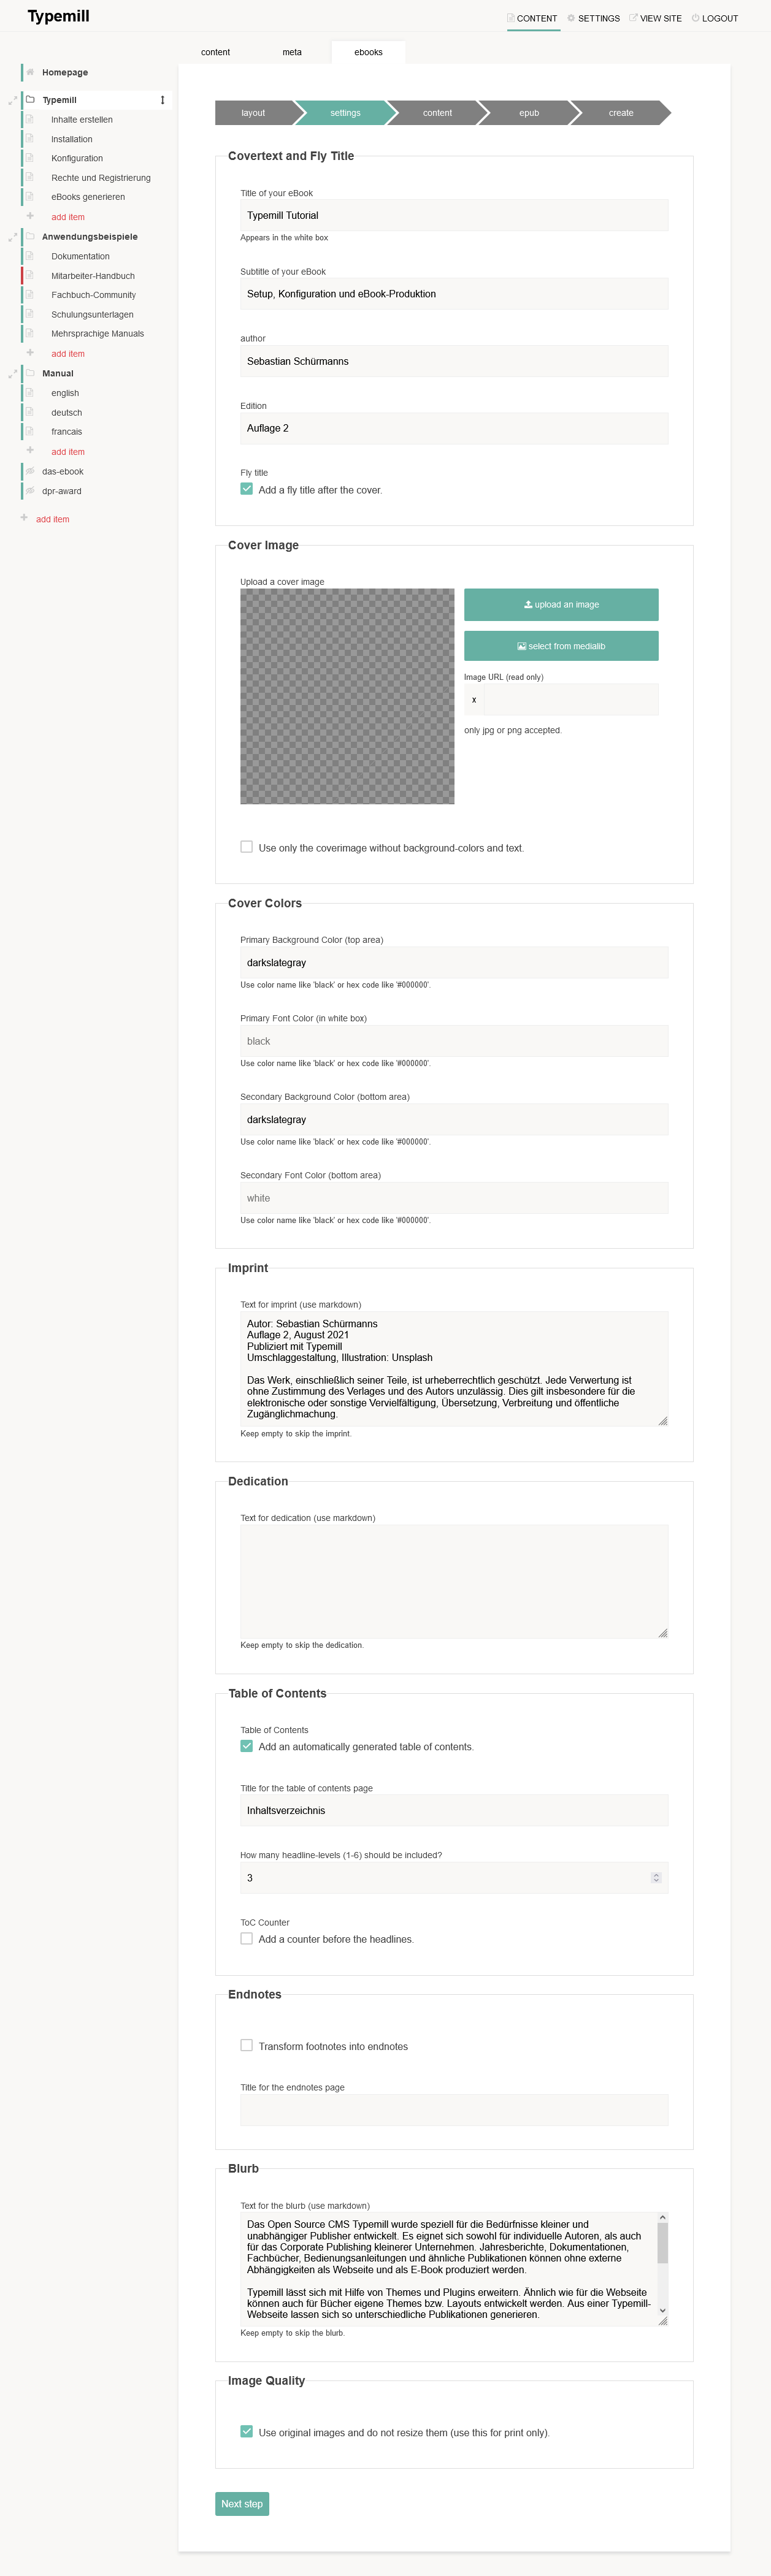
You will find settings for the cover, the title-page, the imprint, the dedication, an automatically generated table of contents, a blurb, and much more. Most settings are pretty self-explanatory, but you should keep an eye on the image quality feature: If you acitvate it, then the original images are used and not the resized versions. In the context of webbased eBooks you should use the resized images. The original images might be good for print-products. Finally test it yourself and decide.
Content
In the content tab, you can select the pages for your publication. You can include or exclude pages starting from the current webpage. If you want to use all pages of the website, the you should switch to the eBook-feature in the settings.
Please note that you can and should refresh the list of pages with the green button, if you added, deleted or changed the order of pages. The pagelist is stored separately and it will not synchronize automatically, so you have to refresh the page list manually.
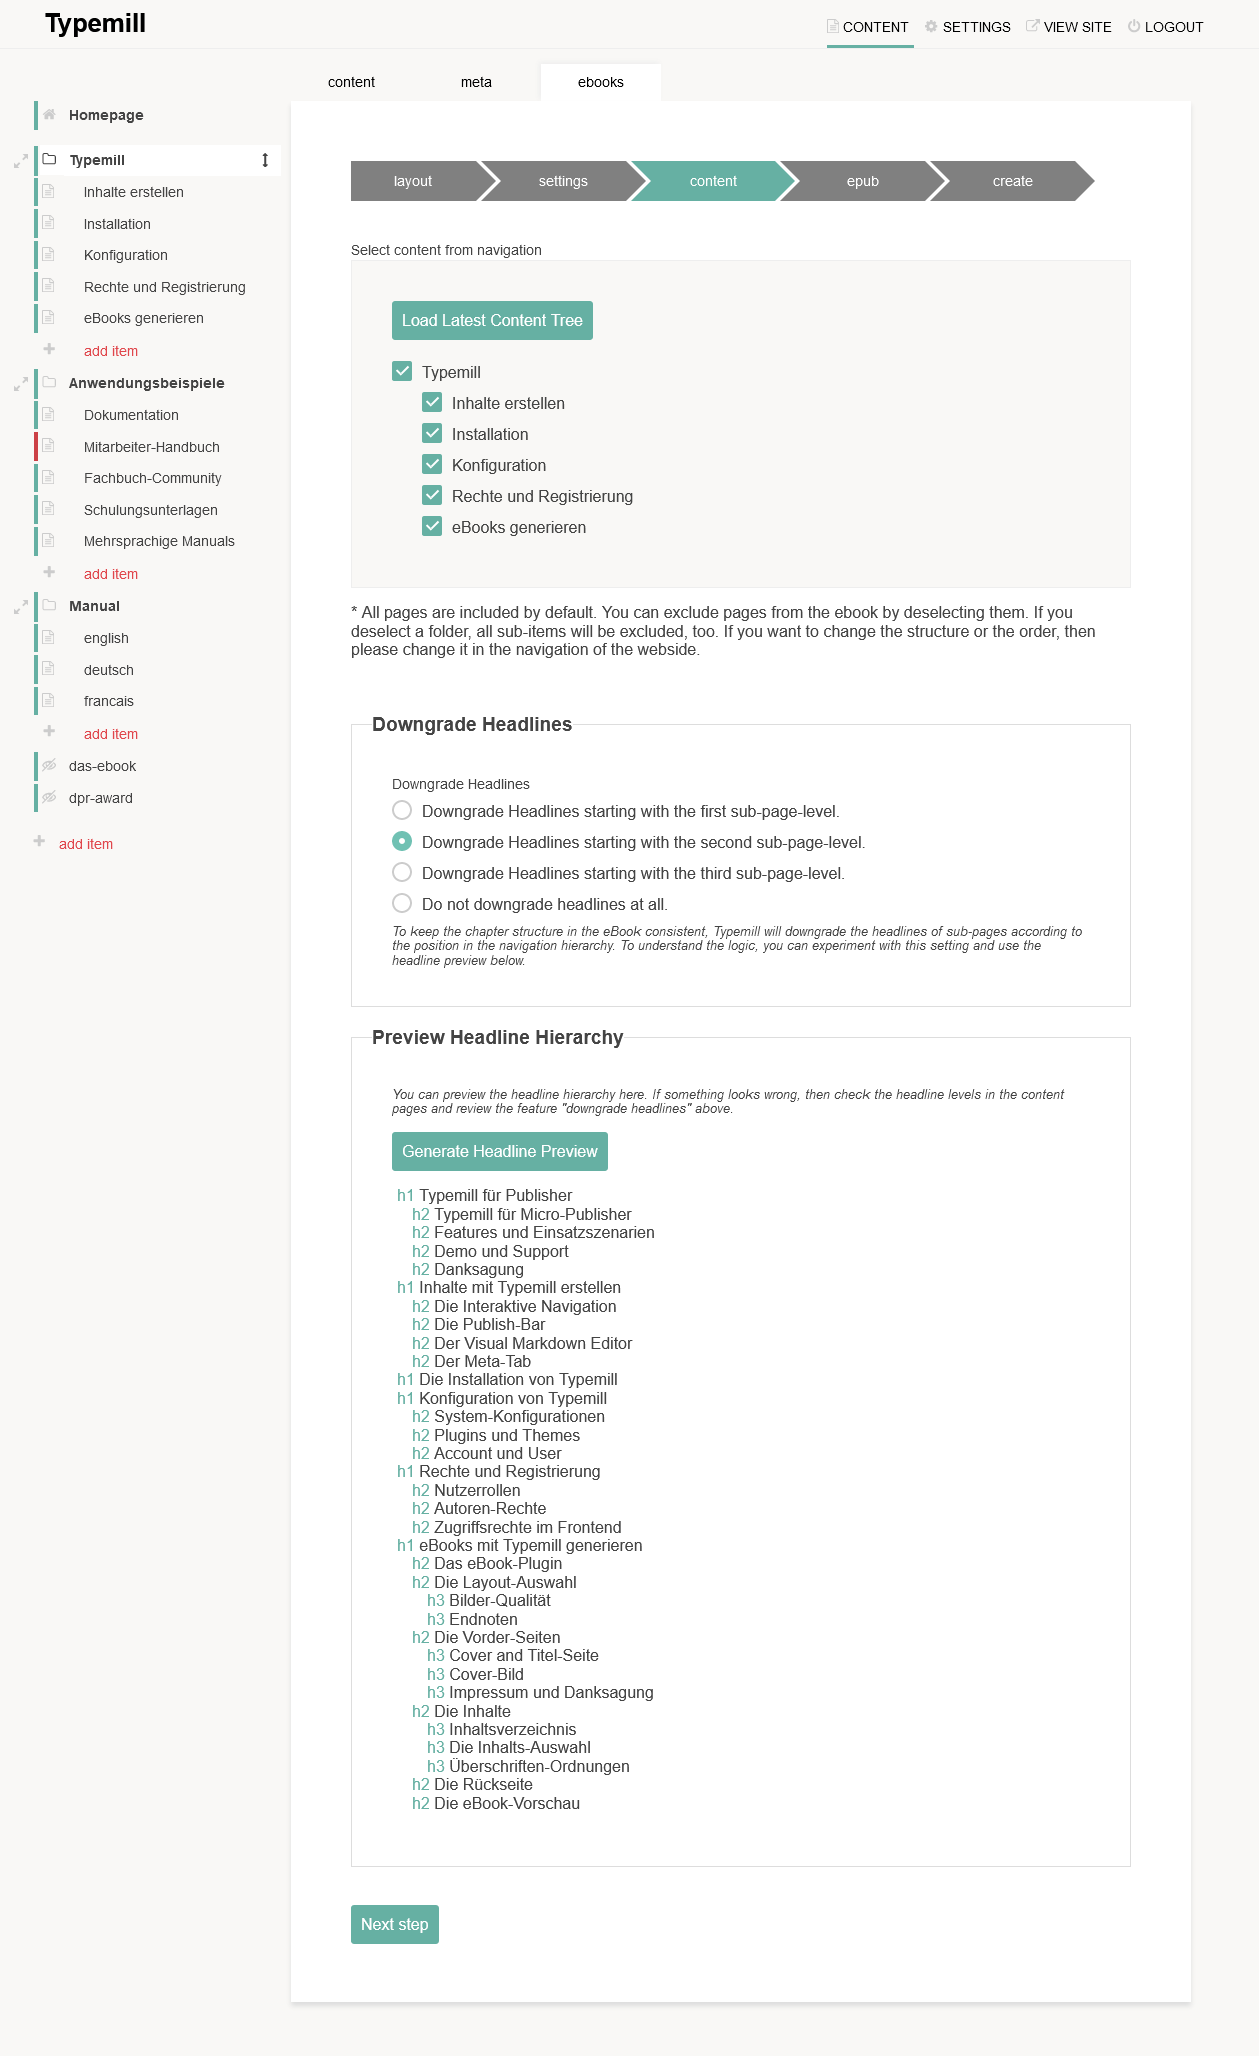
The second feature on this page is the manipulation of headlines. Below that feature you can generate a preview of the headline hierarchy with a button. This is pretty useful because the manipulation of headlines is quite abstract and sometimes hard to understand.
Let's explain the feature with an example: Each page of your website starts with a main headline of the first order (h1), so if you have a main folder with the headline "The whole story" and a subpage with the headline "Story number one", then both headlines have the same order h1. That is not a problem in a website, because there you can see that the "Story number one" is a subpage of the "Whole Story". But in a book, you cannot see the hierarchy of pages anymore and you end up with a lot of separate chapters starting with a headline of the first order.
to reflect the hierarchy of the webpages in the book, you can rewrite the headline-orders so that the hierarchy is correct again. In this example you would choose the option "Downgrade headlines starting with the first subpage level". This way, the headline "The Whole Story" will stay a headline of first order (headline 1), while the headline "Stofy Number One" will become a headline of the second order (headline 2).
You can experiment with the feature and generate headline previews until it fits your needs.
ePUB
The tab "epub" provides some settings that are special to the ePUB format. To create a valid ePUP that can be identified by eReaders, you have to add an identifier. The best option for published books is the ISBN, but you can also generate an UUID with a button.
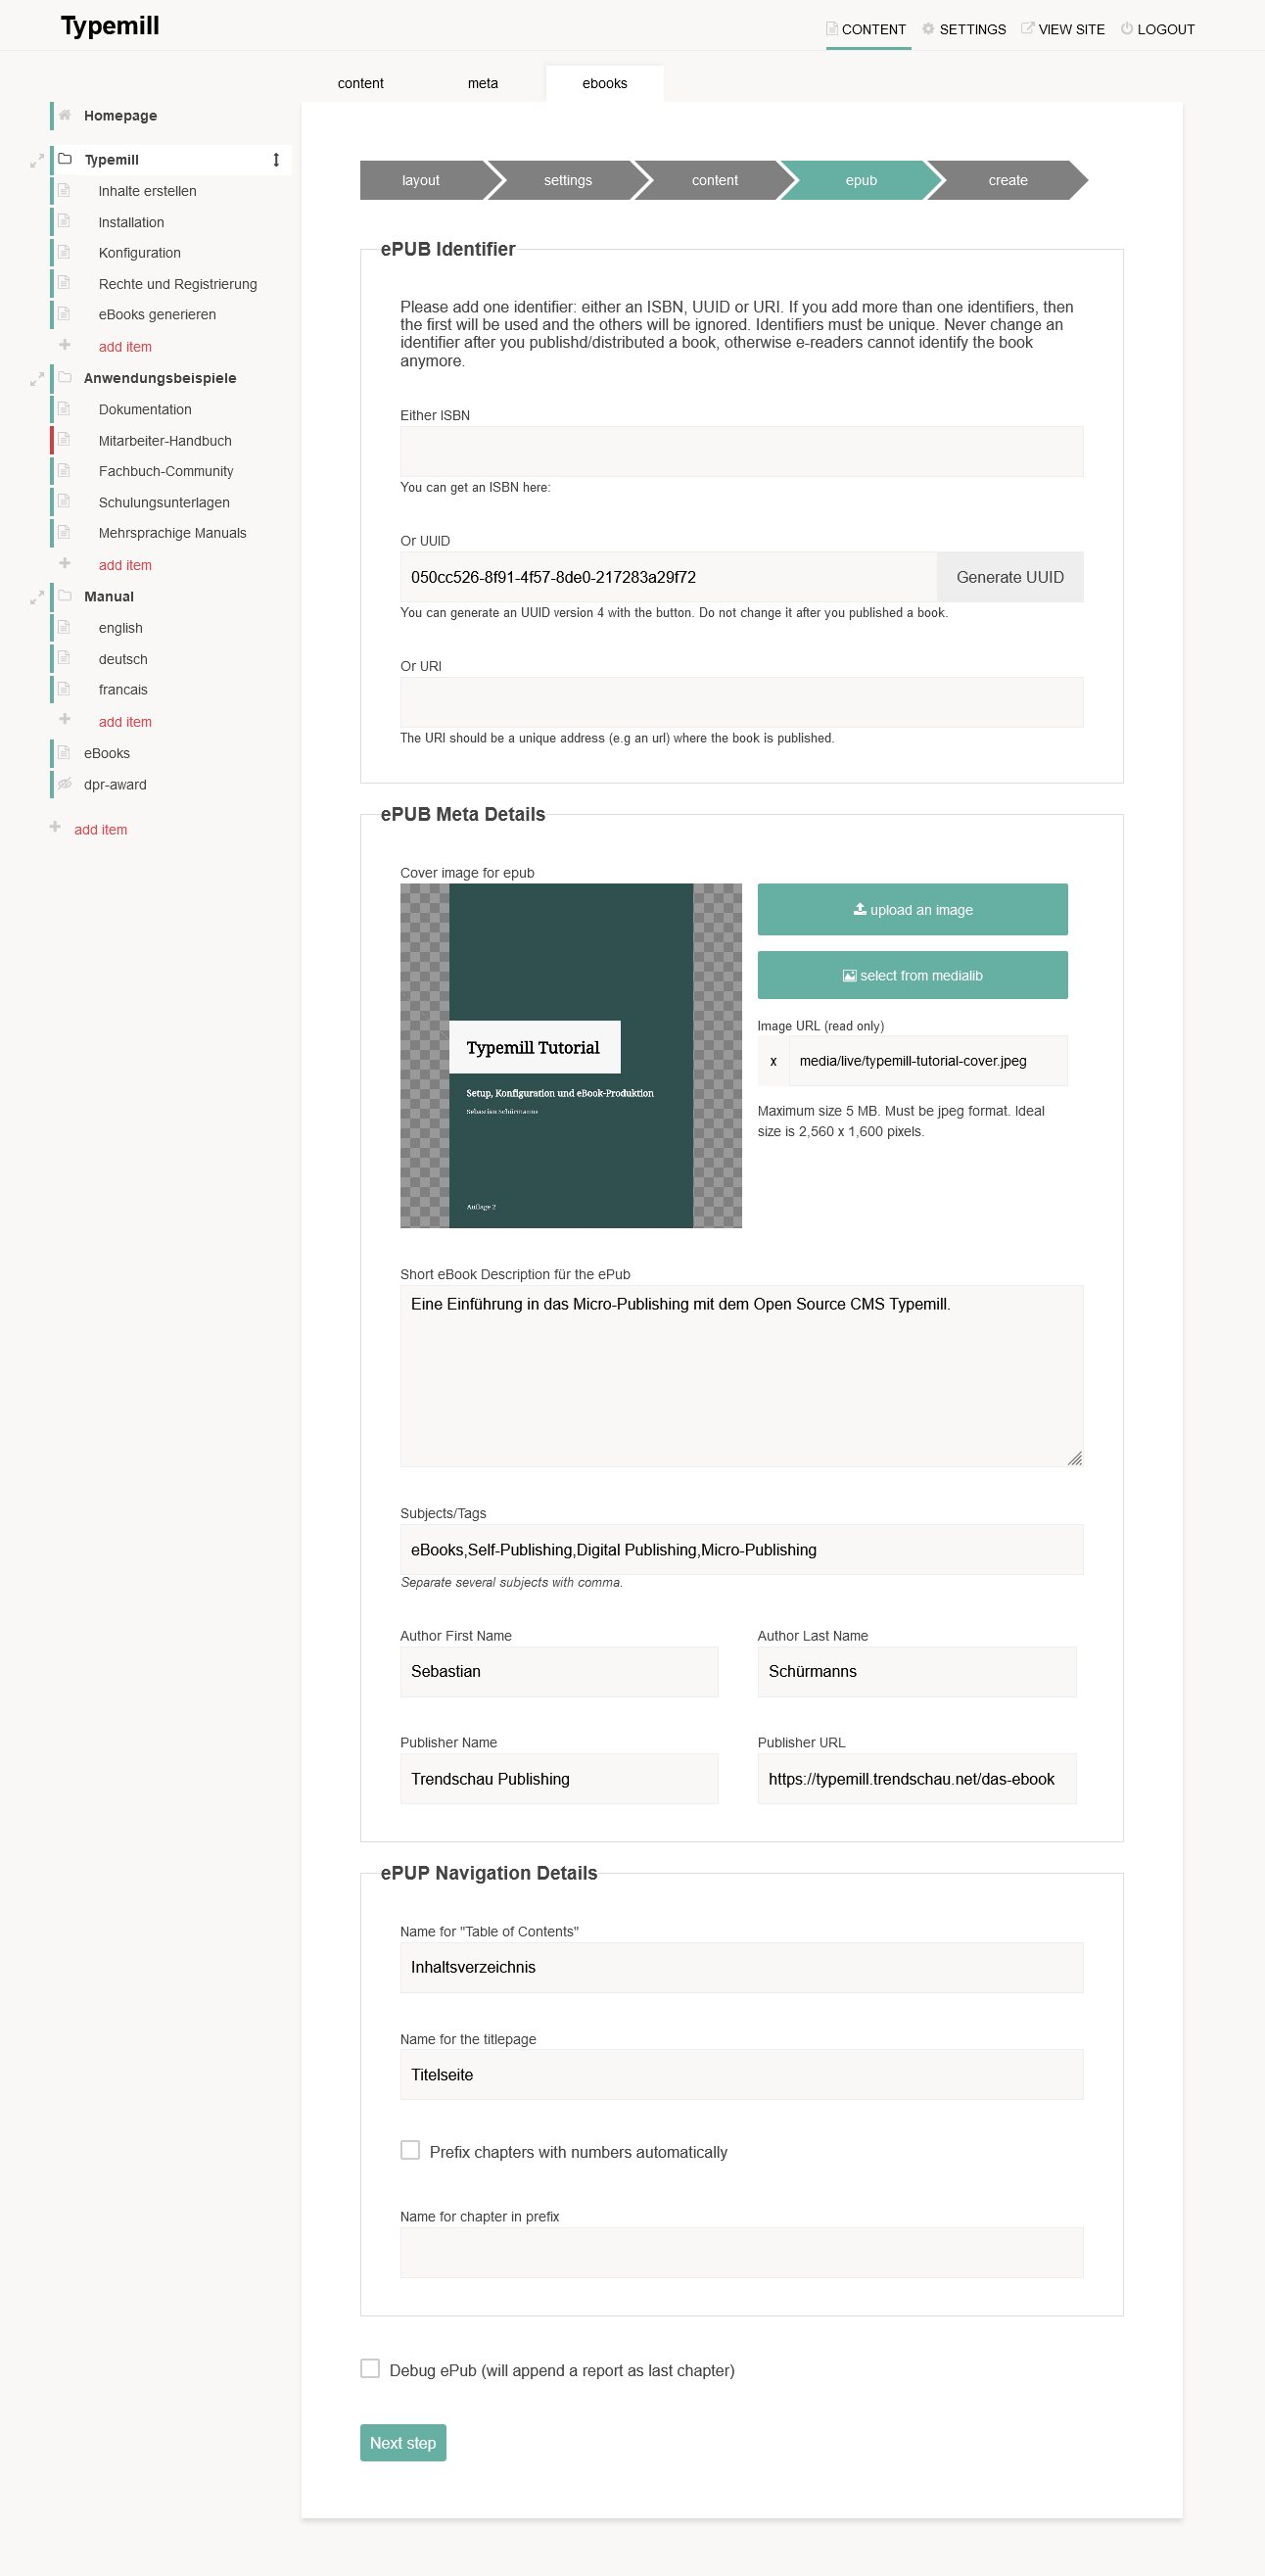
The other fields are meta-information like the author, some subjects/tags, or other settings like the automatic prefixes and counts for chapters.
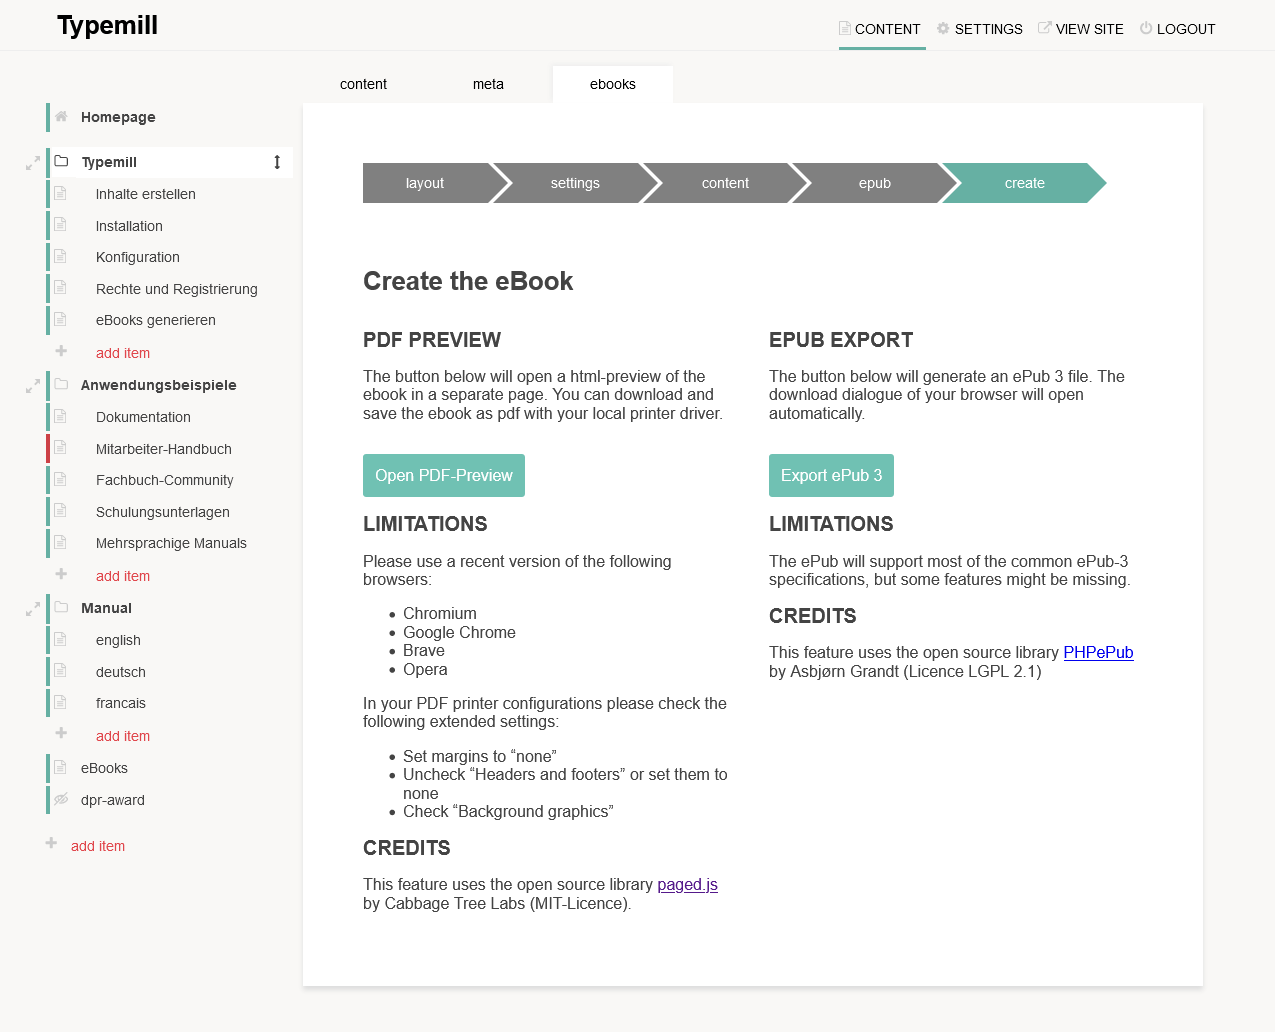
Generate the eBook
On the last tab "create" you can generate the the eBook. You can generate a HTML preview of the PDF-version and then print it out as PDF-file with your local printer driver. Or you can export an ePUB file and download it.